First application
This is a quickstart guide to write your first application on top of JanOS.
Debugging is easier when you don't disconnect the mainboard from the screen yet.
If you need inspiration, we also have a bunch of examples available.
View our examples
Getting source and flashing
When your board boots, it essentially boots into a web browser.
This web browser then opens a single HTML page.
This HTML page can then load extra JavaScript that can interact with the board.
In this guide we'll write some code that vibrates your board; takes a photo;
and sends a SMS message.
First we need to get the base template.
This is the main application that runs on your board.
You can customize the template to load your own JavaScript.
It also comes with a number of handy functions, including WiFi and 2G/3G
data management. Start by cloning jan-os/janos.
After you cloned the repository, open a terminal and run: make install-phone
to push the data to your board.
After this you should see the following data in your terminal.
3 files pushed. 0 files skipped.
3337 KB/s (893137 bytes in 0.261s)
[cmd] sh -c adb push "/Volumes/repos/janos/profile/user.js" //data/local/user.js
750 KB/s (2452 bytes in 0.003s)
[push] Restarting B2G...
[cmd] sh -c adb shell start b2g
At this point the device should show the JanOS logo, and say 'Booting',
which transforms into 'Ready' after a few seconds.
Attaching the debugger
If you made some changes and the device does not finish booting,
or something does not go according to plan,
there is a debugger present which allows you to troubleshoot quickly.
JanOS is compatible with the protocol used by the
Firefox WebIDE.
This is part of the normal Firefox Desktop developer tools, so
install Firefox
(if you don't have it yet). Then:
- After installing Firefox, go into Tools > Web Developer > WebIDE
- On the right top corner, click 'Select Runtime'
- If the device is not in the list yet, follow the instructions on the screen
- In the left top dropdown, choose 'The OS'
- The debugger tools are now attached
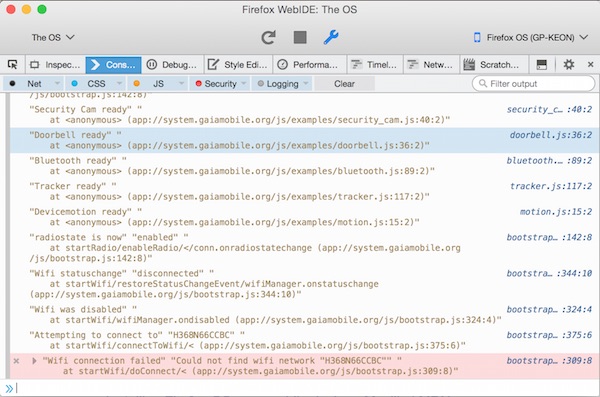
In the 'Console' tab we can now execute some JavaScript that interacts with the device.
In here type: navigator.vibrate(200) to make your board vibrate.
If needed, go into the Debugger tab and debug your code.
Taking a photo
Let's write some code that accesses the camera.
In the base template there is a small helper module (under js/api/camera.js)
to make dealing with the camera a bit easier.
If you feel adventurous: here's the
official docs.
We'll snap a photo from the back camera whenever someone presses the power button,
then we show the image on the screen.
Create a new file under the apps/system/js/ folder, and name it first-app.js.
Fill it with the following code:
// First thing we do is wait until we're booted up
window.addEventListener('ready', function() {
  // This is the main code for your function
  // We'll wait for a press on the POWER button, and in that case take a photo
  window.addEventListener('keydown', function(e) {
    if (e.key === 'Power') {
      // Call the camera helper to take a photo from the back camera
      window.camera.takePicture('back')
        // takePicture returns a promise
        .then(function(res) {
          // res contains a property 'blob' with the image data
          // create an element to show it on the screen
          var img = document.querySelector('img') || document.createElement('img');
          img.src = URL.createObjectURL(res.blob);
          // put it on the body
          document.body.appendChild(img);
        })
        // in case something goes wrong (no camera f.e.),
        // we log it to the debugging console
        .catch(function(err) {
          console.error('Taking photo failed', err);
        });
    }
  });
});
Now add the following line right before </head>
in apps/system/index.html:
<script defer src="js/first-app.js"></script>
After running make install-phone, your power button
will now act as a camera shutter.
You can now use the data from the camera to store images on
the internal storage
or upload them to a server. Go crazy!
Sending a SMS message
For this to work, first plug a SIM card into the SIM card slot of your board.
If you have a board with multiple SIM slots, put it in SIM1.
One of things JanOS does for you automatically, is dealing with the mobile network.
It will automatically sign on to the network for you, and can configure
your internet settings for you, including whether you'd like 2G or 3G.
It can also unlock your SIM PIN code.
To tell the OS your configuration, or your PIN code, there is a configuration
file.
This file is also used for other modules, like the WiFi module.
To get started copy apps/system/js/local_settings.json.example to
apps/system/js/local_settings.json and open the file in a text editor.
"cellular": {
  "roaming": false,
  "edgeOnly": false,
  "pin": "0000"
}
The cellular section has three options:
- roaming To use data when you're in a foreign country (can be expensive)
- edgeOnly Connect to 2G even when 3G is supported, to save battery
- pin SIM PIN code. Is not used when the SIM does not have PIN
Now when we configured this and pushed to the device, and you have a PIN code,
a message regarding pinRequired and pin unlock succeeded will show up in the console.
To use this SIM card to now send a SMS message, put the following code in
first-app.js.
// First thing we do is wait until we're booted up
window.addEventListener('ready', function() {
  // Get reference to the connection of SIM1
  var conn = navigator.mozMobileConnections[0];
  // We can receive messages when connection status changes
  conn.addEventListener('voicechange', function vc() {
    // If we are connected to the phone network
    if (conn.voice.connected) {
      // Remove the event listener, so we don't send the SMS multiple times
      conn.removeEventListener('voicechange', vc);

      // Little safety timing here, sometimes we look connected but the network
      // rejects the SMS message anyway.
      setTimeout(function() {
        // Fill in another phone number here
        var req = navigator.mozMobileMessage.send('+31612345678', 'Hello from JanOS!');
        req.onsuccess = function() {
          console.log('Message sent successfully');
        };
        req.onerror = function() {
          console.error('Could not send SMS', req.error);
        };
      }, 3000);
    }
  });
});
Again, make install-phone and the moment the device
connects to the network, it will send a SMS message to your phone number.
Just remember to remove this code again, before your SMS costs go through the
roof ;-).
Conclusion
That concludes our first steps with JanOS.
You have seen how to push code to the device, attach the debugger,
talk to the camera, and talk to the mobile network.
Have fun hacking!